Showing posts with label cloud. Show all posts

Monday, 19 January 2015

Developing iOS apps and Test with Ionic View For iOS - Apps Development

i'm Big Fan of Ionic Framework and services,Eagerly waiting for ionic Creator GUI interface to develop cross platform apps.Ionic Framework becomes powerful Day to Day and web developers prefer to use it because Cross Platform Supported and good and Responsive User interface unless like JQuery Mobile and Powerful Angular Javascript for Application Logic and Controller.I love to Work with the this framework due to rich UI like bootstrap.Recently They have launched the iOS ionic view to Lively test your apps on ios via ionic Cloud service.Develop your apps wherever ! upload with single command and Download it and use it within the ionic view iOS app.This is Similar idea as like intel app framework to deploy on real device on Android.However since i don't have any MAC Device for Developing ios apps,this helped me to deploy it on original device and test it.


Prerequisites :

1) Learn Here to Install and Work with Ionic apps CLI and to Deploy.
2) Create Account at ionic apps service

Now let us create a Simple Ionic App to work it out in iOS through ionic view.

Procedure :

Open your command prompt and start typing command mentioned below,

> ionic create <app name > blank

This Above command will create Simple Template app with Hello world.

Now just start creating the App from Scratch with HTML/JS/CSS may be cordova plugins for API Access.After just we have to upload the Project files to the ionic service.

>ionic upload

At the First moment it will prompt for Email and Password,Just give away the credentials and you application will be uploaded with success message.

Caution : I had Recently updated Ionic , Cordova npm packages in my System,So.i didn't get any Error messages,So please Check your version and work it out.
Confused State : 

We didn't even add iOS as platform then how could we run it on iOS device,Actually i too had this Starnge :D funny idea but the whole fact is simple,we are uploading the HTML/JS/CSS files and running it in webview of iOS app.so when your deploying standalone app then you should add iOS platform to build the app and release.

Work with your app on iOS :

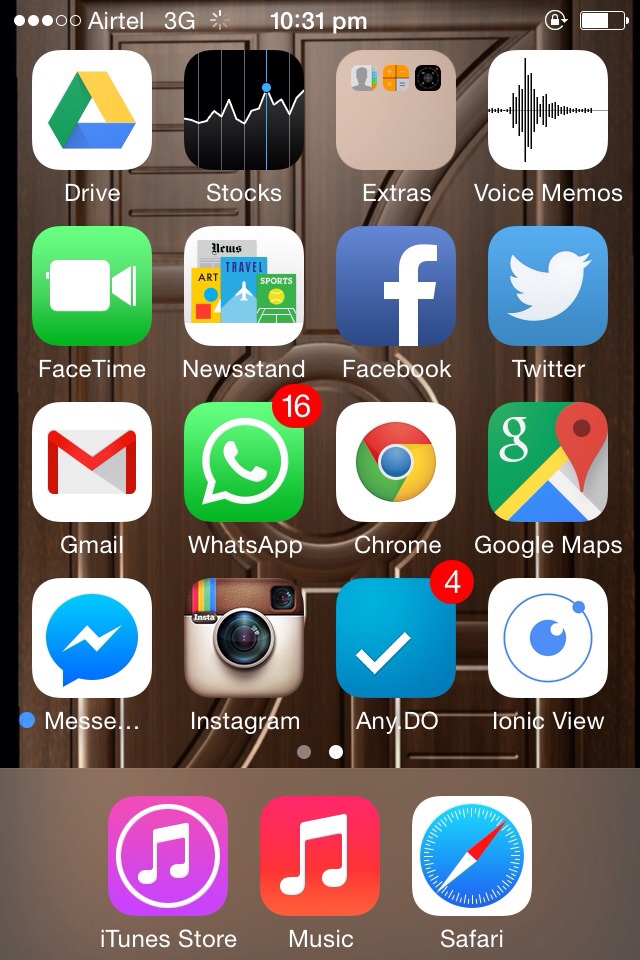
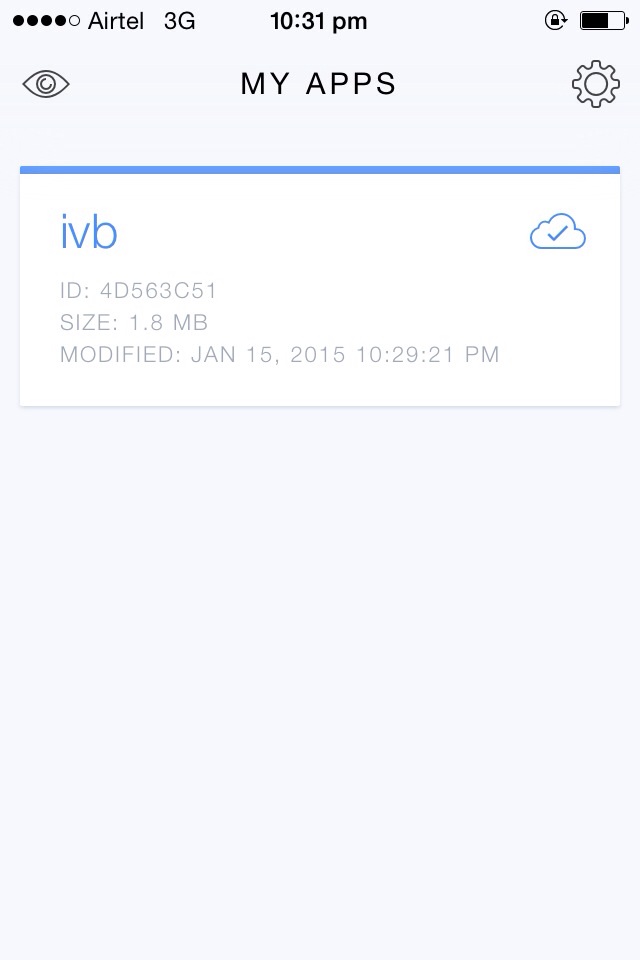
Download the ionic view app from your iTunes Store.Login with your ionic app service credentials and your app will listed in the app.Just click to deploy within the Webview of that app to test it out.That's it.

My Experience : 

Recently i was working with +Mothi Venkatesh for apps development for Blogging platforms,We just Tested it with our Blog simple RSS feeds.


Thus We have Successfully Tested our app in iOS Device,but it may have numerous limitation i hope in future for advanced users and developers.

For bugs/Errors/Comments/Hugs just comment below using Disqus or mail me to s.shivasurya@gmail.com or connect with me in Facebook/twitter/G+ hangout chats for Discussions and Help.Share is care.


Monday, 5 January 2015

Introduction To Internet Of Things - IOT with Frugal Labs at IIT Madras

By last Decade the Internet came up with boom of several technology with popular Programming languages to run at server side and and delivering the clients machine.And by 2007 came up with Mobile Phones with Internet Access and by now it has matured and grown a lot.by the same side Internet usage is also growing and device connected to the internet is also growing heavily.So,some interesting thing came up know as Internet Of Things.Even many more popular company starts supporting it because it's scope in future is really needed when you deeply apply the science and Facts.


I had attended Workshop Recently on Internet Of Things at +IIT Madras with my CollegeMates +SRIRAMAMOORTHY+Puviyarasu , +venkatraman,RamKumar, +sivasakthi,naveen,Senthil.Really it was Awesome to Work with them on IOT hands on Session by Frugal Labs!


So,What is Internet Of Things ?

Internet Of Things is Nothing but simple technique which Machine-Machine Interaction and Decisions,Predictions made by machines programmed and Sensed by sensors and Assisting the Humans Digitally for Day to Day life.

A Fast Video on Internet Of Things :


Some Day to Day IOT Ideas :

IOT comes here to help you to Take Selfie with no Pain :p to monitor the Traffic in a Area and Notify you!Assume you have to take tablets in right time,IOT helps to notify and monitor you assisting digitally.It can Track,Sense and interconnect many Device and Share data and Respond to the Particular Situations.here is Small Video on Real Life Application on Internet Of Things in Day to Day Life!


My Experience @ IIT Madras with Frugal Labs :

We Got small arduino UNO board for Working out and connecting with Cloud and Mobile apps.We have Actually followed Python programming Language to Connect With IOT device and pushing data in to Cloud and KiWi App module from Python for Desktop Apps development and Simple Android App to control Device Via Bluetooth low Energy Device Module.My Small Snaps On Workshop Below!


Arduino Board Connected With USB
A Simple Program to Control LED and Check Temperature using Sensor
Bluetooth Module to communicate between Device and Arduino board


Hello World App :

When We try New Thing we Always perform Hello World ! :D and we too done it successfully using arduino board and some LED lights on Board! 

Temperature Sensor App :

Then Comes Temperature Sensor module where we just coded for getting Room Temperature and Display in our Console.and We took the Data to Parse Cloud with the Help of Parse API and python Coding.

Bluetooth Communication App:

Finally we connected Remotely with Bluetooth to fetch Data from The arduino Board and Displaying in Either Computer Console/Android App console.

Final Word:

And The Above is just Beginner Level of IOT with Arduino programming and supported by INTEL and even more popular companies.hope you have got some Ideas about Internet Of Things Rite now.Visit the Frugal Labs site for more Workshop details and Assistance details.


for more suggestions/Bugs/Hugs/help just mail me to s.shivasurya@gmail.com or start commenting below or chat with me in Facebook/G+ chat.share is care.

Friday, 5 December 2014

How to Scale Your Node.js App - Cluster API & Express with Benchmarking Siege

Though Many Programming language emerge,Javascript Becomes more Powerful Day by Day competing from Front End to back End server and Entering into Desktop apps and Mobile Apps.And becoming popular over GitHub and trending over the world.I have been looking for scaling my Node.js App instance.However it bacame famous by one of it's reason SINGLE THREADED and ASYNCHRONOUS I/O operations.So, now lets create some master and Worker for our Node.js Instance make it run for us in available Processors in Server/Cloud to Balance our Load and Scale Your Node.js Application even Faster.Our Ultimate Aim is to use the Multiple Processor for our App and Maintain a Stable state between Master and Slave Workers and Communication between them.

How to Scale Your Node.js App - Cluster API & Express with Benchmarking Siege

Reference : Download 

Prerequisites :

I would like to go through my previous articles on Basics of Node.js with Express Framework.
Cluster API is Inbuilt Feature of Node.js ,We are just Going to test in our app and use it out.However use it with caution since it is marked as Experimental Feature till Right now.

How Does it Works ? 


Here we are creating a new Worker from master Cluster and working with the Workers,Generally you can fork process based on availability of processor.And if you like to fork even more,just Go through this Stackoverflow Thread.So,your Workers will handle your works automatically to load your balance.

Procedure :


we check it is master process or not and forking process as worker as do our specified operation to respond the client.


 var cluster = require("cluster");

 var cpu = require('os').cpus().length;

 if (cluster.isMaster) {
  
  console.log(cpu);
    cluster.fork();
    cluster.fork();

  
 cluster.on('online', function(worker) {
   console.log("Worker Started pid : "+ worker.process.pid);
 });

 cluster.on('exit', function(worker, code, signal) {

     console.log('worker ' + worker.process.pid + ' stopped');
   });

}
 

Worker Process :

And with else you can write your application logic here to run with worker and respond to client.here you can notify the master thread with IPC and cmd.however we will do some basic operation over it.


 else {
  var express = require("express");
  var app = express();

 app.get("/",function(req,res){

  console.log("request : "+cluster.worker.process.pid); 
  res.send("Welcome to Node.js Cluster API Demo from"+ cluster.worker.process.pid);
 });

 http.createServer(app).listen(3000);


 }


Test with Siege :

Now lets test with Siege tool.Download it from here appropriate operating system install it or extract and use.


use the command as below with your own options to check out the efficiency for our small app.


C:\siege-windows>siege -t1M -c100 -d10s http://localhost:3000

** SIEGE 3.0.5
** Preparing 1500 concurrent users for battle.


With Cluster API node.js 

Without Cluster/Normal Node.js Single Threaded


Further Functions:

You have lot of functions to do with worker and Events to do with Worker and Master and inter process communication is also possible to do Cluster module.Search through npm for more ready made cluster modules for your apt application in production.Check here below for reference guide

Note :

The main thing is to scale the application both Horizontally and vertically.this can be achieved not only by clusters,you can run it in seperate VM's for more scalling.I am too looking for such experience and article.

Hope you Learnt Something quite useful.For Errors/Bugs/hugs/suggestion comment below or mail to s.shivasurya@gmail.com or connect with me in Facebook/Twitter/Linkedin/G+ hangouts.share is care.


Wednesday, 1 October 2014

Working With Apiary.io - Create RESTful WebService Documentation Much Easier

Creating RESTful WebService Doesn't matters here.It matters about how you Provide Documentation for your Users/Developers to consume your web service in Rightful manner.You Need to Create Your Best out of for Documentation and clearly explain with some kind of Demo or Else Developers may seek through Stackoverflow and other forums to resolve their Problem and May hinder development of Apps.apiary.io provides default doc for every API project you create.

Learn Here to create RESTful Webservice using Node.js/Mongoose dB

Working With Apiary.io - Create RESTful WebService Documentation Much Easier


Getting Started :  Visit Demo

Create an Account at apiary.io website and create a Domain in your favour and you can find sample coding for notes API.
Either you can simply Edit that API content and implement yours or else just follow below ideas/procedures to build a Successful API Documentation.

Host and Version For API :


 FORMAT: 1A

 HOST: http://api.example.com/


Name your API with Short Description:


 # Film API
 Film API Web Service Done with Help of Node.js as Backend.


Create a group :


 # Group film
 This Route film can get recent films and post new films


Categorize Your API Routes :


 ## film Routes [/films]


This will automatically create as /film below for each route you define.

Define Each of Your Route :

Here indentation is more important to overcome Symantic Errors.Either 8 Space bar or two Tab key press.


 ### List popular film [GET]
 + Response 200 (application/json)

        [{
          "id": 1, "title": "Neethane En Ponvasantham","genre":"love"
        }, {
          "id": 2, "title": "Moonu - 3 Film","genre":love"

        }]


Actually above Hash(#) must be thrice for defining completely your route with a Name of the route with REQUEST TYPE in SQUARE BRACKET.

Next Step define your Response with HTTP Status code and with return type of Response.
and With Enter key followed with Two tab spaces start typing example results from server

POST request : 


 ### Create a film [POST]
 + Request (application/json)

        { "title": "Yaan","genre":"action" }

 + Response 201 (application/json)


        { "id": 3, "title": "Yaan","genre":"action" }


Routes With Parameters :

Generally Parameters are passed via URL(Actually here URI) to make a GET/DELETE/PUT request.you must clearly specify the Data type and purpose of Parameters to be passed and gain expected data.

Define A specific Routes to categorize since the same uri can be used for GET , POST , PUT.


 ## Film By ID [/film/{id}]
 A single Film Details is performed here

 + Parameters
     + id (required, number, `1`) ... Numeric `id` is unique value given to the Each Film.


As like before follow the indentation here too.Either 8 spaces/two tabs.

Define Each Route Below.


### Retrieve a film  [GET]
+ Response 200 (application/json)

    + Header

            X-My-Header: The Value

    + Body

            { "id": 2, "title": "Neethane En Ponvasantham","genre":"love" }

### Remove a film [DELETE]
+ Response 204


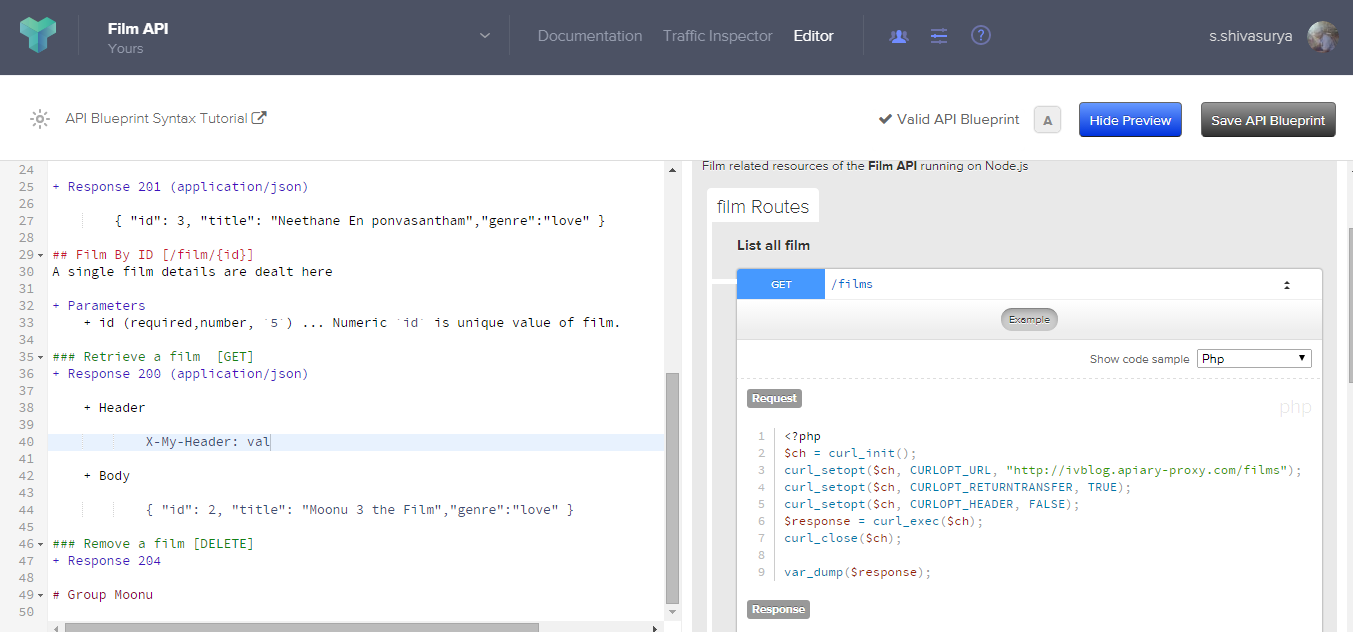
Thus We have Define a Successful doc for our Successful API with Apiary.io,Just preview with Apiary and make changes.

Have a look at my Simple Film API snapshot : visit for full Demo here

Working With Apiary.io - Create RESTful WebService Documentation Much Easier


The Above Screenshot of My API service for film API.

Caution : 
Don't Follow above Example codes,those are not formatted with tabs/Spaces
The Sample will be working only if you add correct host,and make sure of CORS policy of Ajax to run sample properly.Indentation for Response,Request is more important.Either(8 spaces/2 Tabs).

For bugs/comments/suggestions/errors comment below or mail me s.shivasurya@gmail.com or connect with me in Facebook/Twitter.Feel free to comment below.Share is care.

Wednesday, 13 August 2014

Deploy Node.js Application on Openshift Hybrid Cloud - i-visionblog

Nowadays Developers/End users prefer cloud services for their Usage,Storage and Demanding service in one clicks either using credit cards for paying the usage.Business start ups / Developers prefer to host their applications on cloud public for users access, and to manage a huge data ,analyse by powerful cloud machines provided by cloud service providers.Where Business peoples/Developers and others can forget their Hardware specifications and start involving in the Application designs and management.Cloud plays important part in business side data/analytics handling!


Deploy Node.js Application on Openshift Hybrid Cloud - i-visionblog

Article About Cloud at i-visionblog : 

  1. What is Cloud Computing ?  - A Good Explanation for Easy Understanding with Video.
  2. Deploy PHP application - Heroku Cloud [ free untill you add add-ons]
  3. Deploy PHP application+IBM Bluemix Cloud [free trial Period ]
  4. Deploy Node.js Application+IBM Bluemix Cloud Foundry
  5. Deploy Mobile Application DataStore online - Parse.com [ Free for Personal apps ]

Scope : 

Here You can develop a simple Node.js Application at Localhost and make it as deployable at Openshift(Red Hat) .

Installation : (Windows Machine ) :

  • Download GIT command line and make sure accessible via command Line [ git --version  must output with version number] click here to download.
  • Download Ruby Installer [ Stable version ] from here Must be accessible via command line.
  • once all goes well do  C:\> gem install rhc  Must Install you with RHC Client for windows.
  • Go to Red Hat Openshift Website and create a Account & then  Create a Domain name.  
This is Enough to Deploy your app in minutes from desktop.however Mac,Linux others can follow deploy process which is same since Git is Standard.Installation can differ.

RHC Setup :

 C:\ >  rhc setup 

It may prompt you for Adding server host ! Just Skip it by Pressing Enter key.you can add it later too.
Then It may ask you to login with openshift account online emailID and Password in CMD if you're doing it first time.
And allow to add a Private SSH file for authentication purpose - RSA public key adding it permanently on you command line for 30 days life time.Enter "yes" to accept and proceed.

Creating Application :

 I would Generally appreciate you to Go to Openshift website to have Overview of application present.
There are lot of application present to be installed.
  • Add Node.js Application by clicking add application
  • Name your application [ Note that you must have added Domain Name already after sign up ]
  • And Add a custom Url for your application - [ can be changed if you have DNS records ]
  • Git repo is optional here 
  • If you want to scale application for more users,Do load balancing here- [note if you have database in application make sure it is shared across application on different instance shares it]
  • Create Application and Get the Source url starting with SSH:// on console application page
Adding Source :
adding source to application !
  • C:\ > git clone [copy the SSH:// URL here ]
  • This would initialize your application directory for Deploying.
  • Copy your Application Folders/Files with package.json and server.js [server.js name is mandatory to start your application ]
Changes in server.js:

Your Localhost is not equivalent to Cloud Setup so, you must provide ip and Port variable to run your application on cloud.And make sure port,ip should be same as Below for any type of Node.js 

var port = process.env.OPENSHIFT_NODEJS_PORT || 8080;
var ip = process.env.OPENSHIFT_NODEJS_IP || "127.0.0.1";

and At last while making the application to listen to given port,ip

server.listen(port,ip);

A sample of Server.js file :


Thats All just move in to your Directory through Command Prompt .execute three commands succesive manner and deploy your application.For updating application just follow these three commands one by one.

  • C:\ > git add .
  • C:\> git commit -am "initial commit"
  • C:\> git push origin master 
Debug & Logs :

  • just type  C:\> rhc tail <app_name>
will provide you ongoing Requests / Errors in the Node Applications .

Thus we have Successfully Deployed First Node.js Application on Openshift Hybrid Cloud.Openshift is Free to have Three application with Scalable Application , Https Connection access and also more add-ons With Limited three Gears each Application & 1 GB space.Have a try ! be cautious before adding Credit cards because it may cost you for overusage!.

Report for Error/Suggestions as Comments or mail me s.shivasurya@gmail.com / or connect with me in Facebook/Twitter.Enjoyed the Posts,Share is care and Do comments!

Tuesday, 8 July 2014

Working With Google URL Shortener Service API and Create,Track,Maintain Analytics with Google Account - Javascript API


URL shorteners are really useful for stats counting ,providing small sized URL instead of a huge links.Many Business on Internet Social Media needs stats on how many peoples clicked and used the url.However there are lot of service such as +Klout , +Buffer  and so many sites have their own url shorteners and make stats for users and business organiztions based on data clicks,reactions from Popular social networks.So,Creating and maintaining Shortened URL with Performance and scalability is important,Thats why Google gives us API platform where we could Read,Create,Analyse the Shortened URL by them.we are Just using the service provided by Google in rightful way by providing access Tokens , Login.


Working With Google URL Shortener Service API and Create,Track,Maintain Analytics with Google Account - Javascript API
google URL shortner API service
Files   :  Download   |  Live Demo 

Scope : 

I have Written a simple Web application that connect with your Google account and Can fetch Your all Shortened URLs,Analytics and create new URL and shorten them within an instance.

Sponsored :


Installation and Requirements : 

First of All Log into your Google Developer Console for registering our API service and to get API KEY and for Oauth Login. Click here


  • Create a Project and move inside [*note :  I haven't enable Billing for using Cloud or API Service-be cautious while using those service]


  • Under APIs And Auth select API -> enable URL SHORTENER API  alone is enough.


  • Then Move to Credentials Tab.Create API public Key with suitable requirements.select Browser key.


  • API KEY set up
    Then Move To Create Client ID : 
    Application type : Web Application with Authorized javascript Domain Origins and Redirect URL.I have given Both as same Since it is Single page web app under index.php in my localhost
    Get your Corresponding API key from Public API and CLIENT ID for our Web application.

    we need two Scripts from google namely client.js and jquery for easy handling.


     <script src="https://apis.google.com/js/client.js"></script>
     <script src="https://ajax.googleapis.com/ajax/libs/jquery/1.8.2/jquery.min.js"></script>


    Initialize App with Login and Fetching Access Token :
          Juts use Client ID here and Load with gapi.auth.authorize( ) function to authorize our application with an Google account.


      var apiKey = "API _ KEY here";
     var clientId =  "CLIENT _ KEY _ HERE ";
       var scopes ="https://www.googleapis.com/auth/urlshortener";


    Authorize function :

    gapi.auth.authorize   - method just takes client id and scope for authenticating user and provides you access token with gapi.auth.gettoken()


      function auth() {
            var config = {
              'client_id': clientId,
              'scope': scopes
            };
            gapi.auth.authorize(config, function(data) {
              console.log('login complete');
              console.log(gapi.auth.getToken());
             if(data.access_token)
             { $("#login").hide();
                    $("#call").show();
              }
           });
          }


    Create A New Shortened URL : 

    Generally client.load is used initialize with three params namely : scope ,version ,and a call back function to execute.This is the general approach to call API and bring data inside your application for any type of API data pulling,updating service.
    gapi.client.urlshortener.url.insert - is the main function which request the server API for result data and operation.this function just passes the Long url parameter to create shortened URL in return as JSON object.
      
           function load() {
             gapi.client.setApiKey(apiKey);
             gapi.client.load('urlshortener', 'v1', create);
    }
        function create() {
        var url = $("#url").val();
      var request = gapi.client.urlshortener.url.insert({
        'resource': {'longUrl': url }
      });
      request.execute(function(response) {
             // success do something here with responded data
             console.log(response.id);
       });
    }


    Retrieveing Long URL by inputing Short URL : 

    By the same above method gapi.client.urlshortener.url.get is responsible for fetching the relative long URL.
      
           function loadforretrieve() {
             gapi.client.setApiKey(apiKey);
             gapi.client.load('urlshortener', 'v1',read);
    }
        function read() {
         var url = $("#url").val();
      var request = gapi.client.urlshortener.url.get({
        'resource': {'shortUrl': url }
      });
      request.execute(function(response) {
             // success do something here with responded data
             console.log(response);
        });
    }


    Retrieving USER ACCOUNT shortened URL and Analytics :

    Similarly By the two Methods  gapi.client.urlshortener.url.list( ); will list you all URL already shortened by particular logined user.
     gapi.client.urlshortener.url.list({"projection" : "FULL"}); will list you with analytics ,clicks with month,days basis have a look at the response on console after performing the action.
      
           function loadforuser() {
             gapi.client.setApiKey(apiKey);
             gapi.client.load('urlshortener', 'v1',userapi);
    }
        function userapi() {
         var url = $("#url").val();
      var request = gapi.client.urlshortener.url.list);
      request.execute(function(response) {
             // success do something here with responded data
             console.log(response);
        });
    }


    You can achieve this function calls simply by button inputs onclick events and you should do with logic since you have jquery for hiding login button after authentication and displaying input box to create.

    If you have any doubt just ask in comments/mail me s.shivasurya@gmail.com.if you can find any bugs comment below.Share is care.

    Working With Google URL Shortener Service API and Create,Track,Maintain Analytics with Google Account - Javascript API


    URL shorteners are really useful for stats counting ,providing small sized URL instead of a huge links.Many Business on Internet Social Media needs stats on how many peoples clicked and used the url.However there are lot of service such as +Klout , +Buffer  and so many sites have their own url shorteners and make stats for users and business organiztions based on data clicks,reactions from Popular social networks.So,Creating and maintaining Shortened URL with Performance and scalability is important,Thats why Google gives us API platform where we could Read,Create,Analyse the Shortened URL by them.we are Just using the service provided by Google in rightful way by providing access Tokens , Login.


    Working With Google URL Shortener Service API and Create,Track,Maintain Analytics with Google Account - Javascript API
    google URL shortner API service
    Files   :  Download   |  Live Demo 

    Scope : 

    I have Written a simple Web application that connect with your Google account and Can fetch Your all Shortened URLs,Analytics and create new URL and shorten them within an instance.

    Installation and Requirements : 

    First of All Log into your Google Developer Console for registering our API service and to get API KEY and for Oauth Login. Click here


  • Create a Project and move inside [*note :  I haven't enable Billing for using Cloud or API Service-be cautious while using those service]


  • Under APIs And Auth select API -> enable URL SHORTENER API  alone is enough.


  • Then Move to Credentials Tab.Create API public Key with suitable requirements.select Browser key.


  • API KEY set up
    Then Move To Create Client ID : 
    Application type : Web Application with Authorized javascript Domain Origins and Redirect URL.I have given Both as same Since it is Single page web app under index.php in my localhost
    Get your Corresponding API key from Public API and CLIENT ID for our Web application.

    we need two Scripts from google namely client.js and jquery for easy handling.


     <script src="https://apis.google.com/js/client.js"></script>
     <script src="https://ajax.googleapis.com/ajax/libs/jquery/1.8.2/jquery.min.js"></script>


    Initialize App with Login and Fetching Access Token :
          Juts use Client ID here and Load with gapi.auth.authorize( ) function to authorize our application with an Google account.


      var apiKey = "API _ KEY here";
     var clientId =  "CLIENT _ KEY _ HERE ";
       var scopes ="https://www.googleapis.com/auth/urlshortener";


    Authorize function :

    gapi.auth.authorize   - method just takes client id and scope for authenticating user and provides you access token with gapi.auth.gettoken()


      function auth() {
            var config = {
              'client_id': clientId,
              'scope': scopes
            };
            gapi.auth.authorize(config, function(data) {
              console.log('login complete');
              console.log(gapi.auth.getToken());
             if(data.access_token)
             { $("#login").hide();
                    $("#call").show();
              }
           });
          }


    Create A New Shortened URL : 

    Generally client.load is used initialize with three params namely : scope ,version ,and a call back function to execute.This is the general approach to call API and bring data inside your application for any type of API data pulling,updating service.
    gapi.client.urlshortener.url.insert - is the main function which request the server API for result data and operation.this function just passes the Long url parameter to create shortened URL in return as JSON object.
      
           function load() {
             gapi.client.setApiKey(apiKey);
             gapi.client.load('urlshortener', 'v1', create);
    }
        function create() {
        var url = $("#url").val();
      var request = gapi.client.urlshortener.url.insert({
        'resource': {'longUrl': url }
      });
      request.execute(function(response) {
             // success do something here with responded data
             console.log(response.id);
       });
    }


    Retrieveing Long URL by inputing Short URL : 

    By the same above method gapi.client.urlshortener.url.get is responsible for fetching the relative long URL.
      
           function loadforretrieve() {
             gapi.client.setApiKey(apiKey);
             gapi.client.load('urlshortener', 'v1',read);
    }
        function read() {
         var url = $("#url").val();
      var request = gapi.client.urlshortener.url.get({
        'resource': {'shortUrl': url }
      });
      request.execute(function(response) {
             // success do something here with responded data
             console.log(response);
        });
    }


    Retrieving USER ACCOUNT shortened URL and Analytics :

    Similarly By the two Methods  gapi.client.urlshortener.url.list( ); will list you all URL already shortened by particular logined user.
     gapi.client.urlshortener.url.list({"projection" : "FULL"}); will list you with analytics ,clicks with month,days basis have a look at the response on console after performing the action.
      
           function loadforuser() {
             gapi.client.setApiKey(apiKey);
             gapi.client.load('urlshortener', 'v1',userapi);
    }
        function userapi() {
         var url = $("#url").val();
      var request = gapi.client.urlshortener.url.list);
      request.execute(function(response) {
             // success do something here with responded data
             console.log(response);
        });
    }


    You can achieve this function calls simply by button inputs onclick events and you should do with logic since you have jquery for hiding login button after authentication and displaying input box to create.

    If you have any doubt just ask in comments/mail me s.shivasurya@gmail.com.if you can find any bugs comment below.Share is care.